Registered Mail Labels:
This section provides an overview of the Registered Mail option and how to create barcoded labels that will allow you to access advanced tracking options, to track by customer reference number and to receive email notifications.
Note: You can still use the Registered Mail option by selecting Registered on the Lettermail mailing page but you will not be able to create a label there.
Create a Registered Mail Label:
- Create a new Lettermail mailing. Then, from the Mailing Type drop-down list, select one of the following:
- Full Mailing � One Deposit
- Partial Mailing � Details Unknown
- Partial Details Known
- There are 2 ways to create a registered mail label:
- File Import
- Data Entry (Continue with step 3 below)
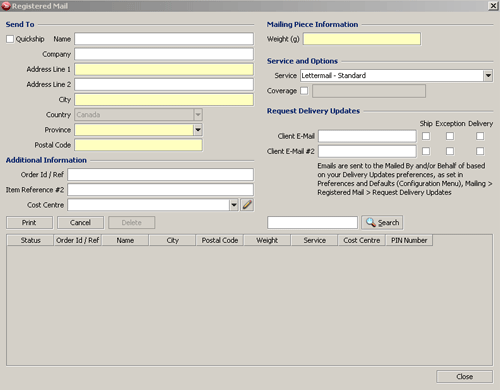
- From the top navigation, select Registered Label.
- If your mail item is not addressed, enter the destination address, which will be printed on the output label. Fill out all mandatory fields highlighted in yellow.
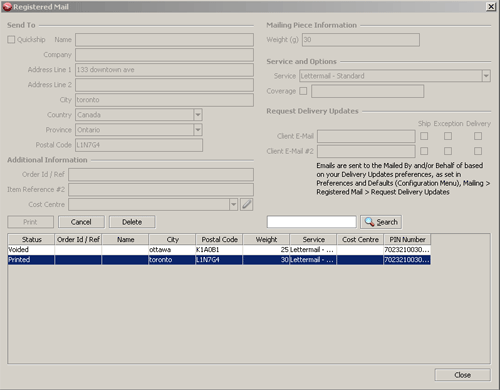
If your mail item is already addressed, select the Quickship checkbox. Quickship saves you from re-keying an address. Simply enter the province and Postal Code and complete any other mandatory fields highlighted in yellow. EST will generate a barcode label without an address block. - Select Print. The order will appear at the bottom of the Registered Mail window.
- To void a label, highlight the item and select Delete. This will change the Status from Printed to Voided
- When you are finished creating labels, select Close. This will bring you back to the Lettermail screen with the updated SOM volume information to reflect the labels created. Continue as per the Lettermail process to Finalize and Transmit the mailing.


Import Registered Mail
When choosing to Import ![]() a file format 12 for Registered Mail you will be presented with the option to Save or Print.
a file format 12 for Registered Mail you will be presented with the option to Save or Print.
- Save � allows you to save the information for printing at a later time.
- Print � this option produces the labels immediately.
Registered Mail Search
Search allows you to easily find a mailing for editing, deleting or processing.
- In the Toolbar, enter your search term in the Search box.

Searches are conducted against the following shipment fields: - Order Id/Ref 1
- Name
- PIN (if mailing is printed).
- Select Search.
Note: You can enter more than one search term to narrow your search results (you do not need to use commas to separate terms) or you can leave the Search box empty to return all mailings.
Next Steps:
Select a Mailing to Print, Cancel or Delete


